Activity
Forcing Plant Bulbs

Grade Level: 2nd - 6th; Type: Life Sciences
Objective:
- The project is about learning how temperature creates annual rhythms that govern plant growth.
- The goals are to familiarize the students with annual rhythms and distinguish them from circadian rhythms.
Research Questions:
- What is an annual rhythm? What is a circadian rhythm?
- What types of plant behavior is annual? What type is circadian?
- Can natural plant behaviors be changed through artificial means?
- Why is “wintering over” necessary for some plants and not necessary for others?
Everyone is familiar with the seasonality of plant growth. New shoots pop out of the ground in the spring, vegetables grow in the summer, leaves change color in the fall and growth slows in the winter. Some of these events, like leaves changing color, are controlled by the light and the length of the day. Other growth, such as germination of some bulbs, is governed by temperature. Many bulbs require a “wintering-over” period of cold temperatures that can be emulated in the freezer. This wintering-over is not required for all bulbs. Some bulbs, particularly those like amaryllis that are native to tropical areas, do not require wintering over.
Materials:
- Students need a variety of bulbs such as tulips, daffodils, crocuses, lilies, hyacinths, gladiolus, amaryllis and paper whites, with 2-4 of each type of bulb.
- Potting soil
- At least six individual pots big enough for the bulbs (big yogurt containers with holes punched in the bottom are acceptable). Six pots will accommodate an experimental involving three different types of bulb.
- Access to a freezer
- Materials are seasonally available in nurseries and garden shops. Some families may already have a supply of bulbs in the ground.
Experimental Procedure:
- Put half of each type of bulb in the freezer. Leave the other half of each type at room temperature. Don’t get these confused! Leave the bulbs in the freezer for two weeks.
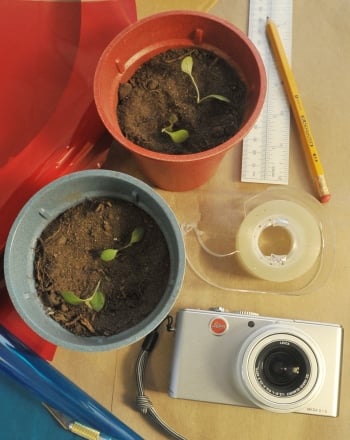
- Set out two pots for each type of bulb. Prepare the planting containers by filling them with potting soil. Label the pots as to the type of bulb and whether it is for the “wintered-over” bulbs or a control (for the un-refrigerated bulbs).
- After you have refrigerated your bulbs for two weeks, remove them from the fridge and plant them with the pointy end down. You can plant several of the crocus bulbs in a single container, but make sure there is adequate soil. Cover the bulb with soil and lightly water.
- Create a chart that you will use for measuring the plant growth every day.
- Look at your pots every day. Once new shoots appear, measure them every day and chart your data. Which plants grew the most? Which grew the least? Did “wintering over” make a difference for all the plants?
References:
Books
Robbins, Ken. A Flower Grows. Dial Press (1990)
Wilkins, M. Plantwatching. Facts on File (1988)
Websites
Gardener’s Supply Company: Growing Bulbs Indoors
http://www.gardeners.com/Growing-Bulbs-Indoors/5158,default,pg.html
How Stuff Works: Planting Bulbs
http://home.howstuffworks.com/planting-bulbs.htm
Wilkins, M. (1988). Plantwatching. New York: Facts on File
Education.com provides the Science Fair Project Ideas for informational purposes only. Education.com does not make any guarantee or representation regarding the Science Fair Project Ideas and is not responsible or liable for any loss or damage, directly or indirectly, caused by your use of such information. By accessing the Science Fair Project Ideas, you waive and renounce any claims against Education.com that arise thereof. In addition, your access to Education.com's website and Science Fair Project Ideas is covered by Education.com's Privacy Policy and site Terms of Use, which include limitations on Education.com's liability.
Warning is hereby given that not all Project Ideas are appropriate for all individuals or in all circumstances. Implementation of any Science Project Idea should be undertaken only in appropriate settings and with appropriate parental or other supervision. Reading and following the safety precautions of all materials used in a project is the sole responsibility of each individual. For further information, consult your state's handbook of Science Safety.
Related learning resources